7. The board
This chapter introduces the board, its hardware and how to boot it.
7.1. Hardware
The hardware documentation of i.MX6 SoloX SabreSD can be found here:
SABRE Board for Smart Devices Reference Design Based on the i.MX 6 Series
7.2. Power-On
i.MX6 SoloX SabreSD takes the power from the J1 connector. The board is shipped with an external power adapter.
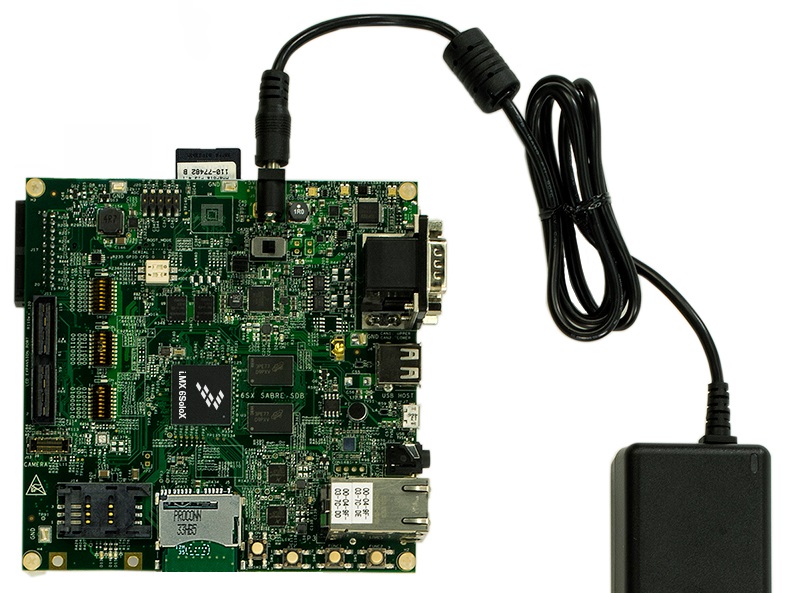
To power-on the board, connect the power supply to J1 and toggle SW1-PWRON switch.
7.3. Serial Console
On i.MX6 SoloX SabreSD the OTG USB-UART port is used for serial console.
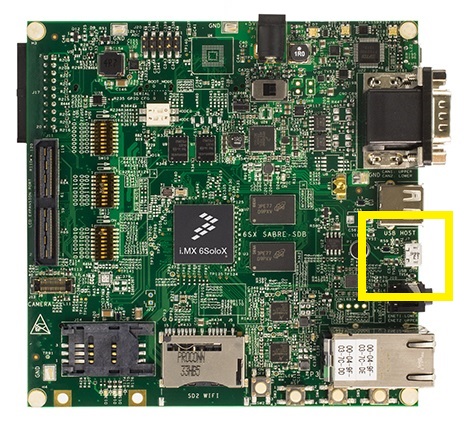
which you can connect, by means of a micro-USB cable, to your personal computer.
Note
Every operating system has its own killer application to give you a serial terminal interface. In this guide, we are assuming your host operating system is Ubuntu.
On a Linux (Ubuntu) host machine, the console is seen as a ttyACMX device and you can access to it by means of an application like minicom.
Minicom needs to know the name of the serial device. The simplest way for you to discover the name of the device is by looking to the kernel messages, so:
- clean the kernel messages
sudo dmesg -c- connect the mini-USB cable to the board already powered-on
- display the kernel messages
dmesg- read the output
[ 5522.462414] usb 2-1.1: new full-speed USB device number 6 using ehci_hcd
[ 5522.557574] cp210x 2-1.1:1.0: cp210x converter detected
[ 5522.630151] usb 2-1.1: reset full-speed USB device number 6 using ehci_hcd
[ 5522.723501] usb 2-1.1: cp210x converter now attached to /dev/ttyUSB0
As you can see, here the device has been recognized as /dev/ttyUSB0.
Now that you know the device name, run minicom:
sudo minicom -wsIf minicom is not installed, you can install it with:
sudo apt-get install minicomthen you can setup your port with these parameters:
+-----------------------------------------------------------------------+
| A -    Serial Device      : /dev/ttyUSB0                              |
| B - Lockfile Location     : /var/lock                                 |
| C -   Callin Program      :                                           |
| D -  Callout Program      :                                           |
| E -    Bps/Par/Bits       : 115200 8N1                                |
| F - Hardware Flow Control : No                                        |
| G - Software Flow Control : No                                        |
|                                                                       |
|    Change which setting?                                              |
+-----------------------------------------------------------------------+
        | Screen and keyboard      |
        | Save setup as dfl        |
        | Save setup as..          |
        | Exit                     |
        | Exit from Minicom        |
        +--------------------------+
If on your system the device has not been recognized as /dev/ttyUSB0, just replace /dev/ttyUSB0 with the proper device.
Once you are done configuring the serial port, you are back to minicom main menu and you can select exit.
7.4. Let’s boot
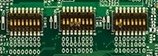
Make sure that i.MX6 SoloX SabreSD boot mode jumpers are set like in the following picture:
Insert the SD card you just prepared inside socket SD4.
Connect the mini-USB cable from your PC to i.MX6 SoloX SabreSD USB OTG connector .
And now proceed by setting up the serial console.
On i.MX6 SoloX SabreSD the OTG USB-UART port is used for serial console.
which you can connect, by means of a micro-USB cable, to your personal computer.
Note
Every operating system has its own killer application to give you a serial terminal interface. In this guide, we are assuming your host operating system is Ubuntu.
On a Linux (Ubuntu) host machine, the console is seen as a ttyACMX device and you can access to it by means of an application like minicom.
Minicom needs to know the name of the serial device. The simplest way for you to discover the name of the device is by looking to the kernel messages, so:
- clean the kernel messages
sudo dmesg -c- connect the mini-USB cable to the board already powered-on
- display the kernel messages
dmesg- read the output
[ 5522.462414] usb 2-1.1: new full-speed USB device number 6 using ehci_hcd
[ 5522.557574] cp210x 2-1.1:1.0: cp210x converter detected
[ 5522.630151] usb 2-1.1: reset full-speed USB device number 6 using ehci_hcd
[ 5522.723501] usb 2-1.1: cp210x converter now attached to /dev/ttyUSB0
As you can see, here the device has been recognized as /dev/ttyUSB0.
Now that you know the device name, run minicom:
sudo minicom -wsIf minicom is not installed, you can install it with:
sudo apt-get install minicomthen you can setup your port with these parameters:
+-----------------------------------------------------------------------+
| A -    Serial Device      : /dev/ttyUSB0                              |
| B - Lockfile Location     : /var/lock                                 |
| C -   Callin Program      :                                           |
| D -  Callout Program      :                                           |
| E -    Bps/Par/Bits       : 115200 8N1                                |
| F - Hardware Flow Control : No                                        |
| G - Software Flow Control : No                                        |
|                                                                       |
|    Change which setting?                                              |
+-----------------------------------------------------------------------+
        | Screen and keyboard      |
        | Save setup as dfl        |
        | Save setup as..          |
        | Exit                     |
        | Exit from Minicom        |
        +--------------------------+
If on your system the device has not been recognized as /dev/ttyUSB0, just replace /dev/ttyUSB0 with the proper device.
Once you are done configuring the serial port, you are back to minicom main menu and you can select exit.
Give root to the login prompt:
imx6sxsabresd login: rootand press Enter.
Note
Sometimes, the time you spend setting up minicom makes you miss all the output that leads to the login and you see just a black screen, press Enter then to get the login prompt.
For more information on flashing, see Section “Booting from an SD card” in the i.MX Linux® User’s Guide
7.5. Network
2x 10/100/1000 Ethernet ports.